With just a few fantastic farmhouse DIY’s and ideas, you can easily create a farmhouse look in just about every room of your home.
Like most of us, we want to live in a gorgeous farmhouse style home in the middle of 50 acres. However, that is always not the case. Suburban lifestyle is what most of us have. Homesteading can be a dream, but we are lucky if we have a little plot of land with raised garden beds and a small chicken coop.
This post contains affiliate links, which means I make a small commission at no extra cost to you. You will find my full disclosure here.
With just a few fantastic farmhouse DIY’s and ideas you can easily create a farmhouse look in just about every room of your home.
Start Small
You made need to start small, look around your home to see if you can find something that you can repurpose and recreate. You may need to start out with an old coffee table to redo.
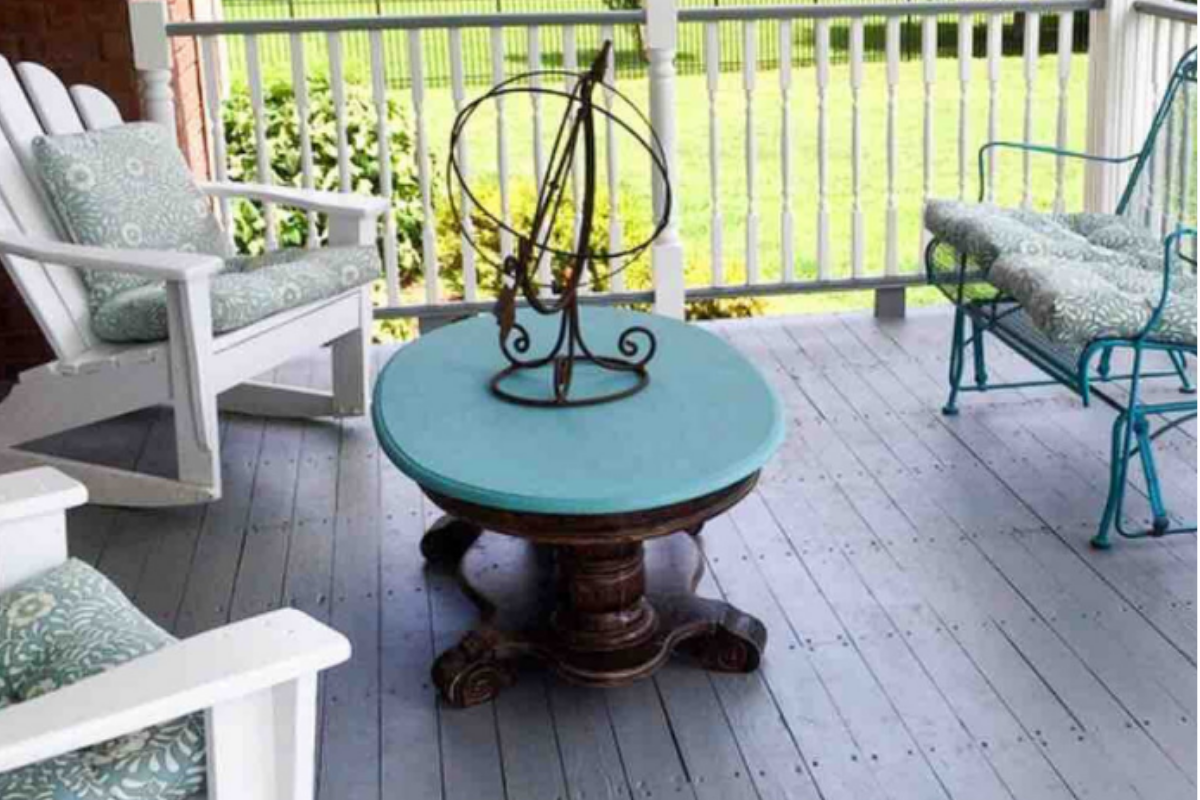
I have an old coffee table, that I think has been every color imaginable. This coffee table has been around for about 30 years. With the wonders of chalk paint, you can paint anything with very little prep work.
This coffee table has been everywhere, outside on the porch, in the living room and now in our family room.
First of all, although I mentioned there was very little prep work, there is some prep work. I have found that when you paint anything there will be some prep work.
Cleaning Your Item
Always start by cleaning your items, whatever that item may be. I like to use TSP, I typically wear gloves while I do this. I buy my TSP here.
Light Sanding
I also like to do some light sanding to my piece, particularly if its wood or metal. I use 120 grit to do most of my before and after sanding.
Priming the Item
This coffee table has been painted many colors, the last being chalk paint on the tabletop and the base was stained in a walnut color. Both were very dark colors. In order to avoid any bleeding and having to paint multiple coats, its best to give it a couple of good coats of primer. The amount of coats depends on how dark the furniture is. This table was pretty dark. I use a spray primer like this.
Make sure that you allow the primer to dry in between coats and at least let it dry 24 hours before you begin to chalk paint it.
DIY Chalk Paint
There are many chalk paints out in the market and I’ve tried several of them. Most of them are very pricey and way out of my range. My favorite chalk paint is one that I make myself.
Click here to get all the instructions on how to make your DIY chalk paint.
Painting
Begin painting your item keeping in mind that chalk paint dries very fast. Once you have painted your item, allow it to dry for at least 48 hours.
Sanding and Distressing
If you want the distressed look, you can lightly sand the edges on the table with 220 grit sandpaper. Or, if you want it chippy, use coarser sandpaper and sand away.
Are you a Collector
If you are a collector and most of us are, I collect dishes, printer trays, tobacco baskets, Rae Dunn and my list goes on. Find your collection that you have tucked away in a closet or around the house, and start a grouping. Your grouping can be on the wall, on a sofa table, on top of a dresser. Arrange your grouping and add different textures to it.
Below is the grouping of my printer trays in my home.
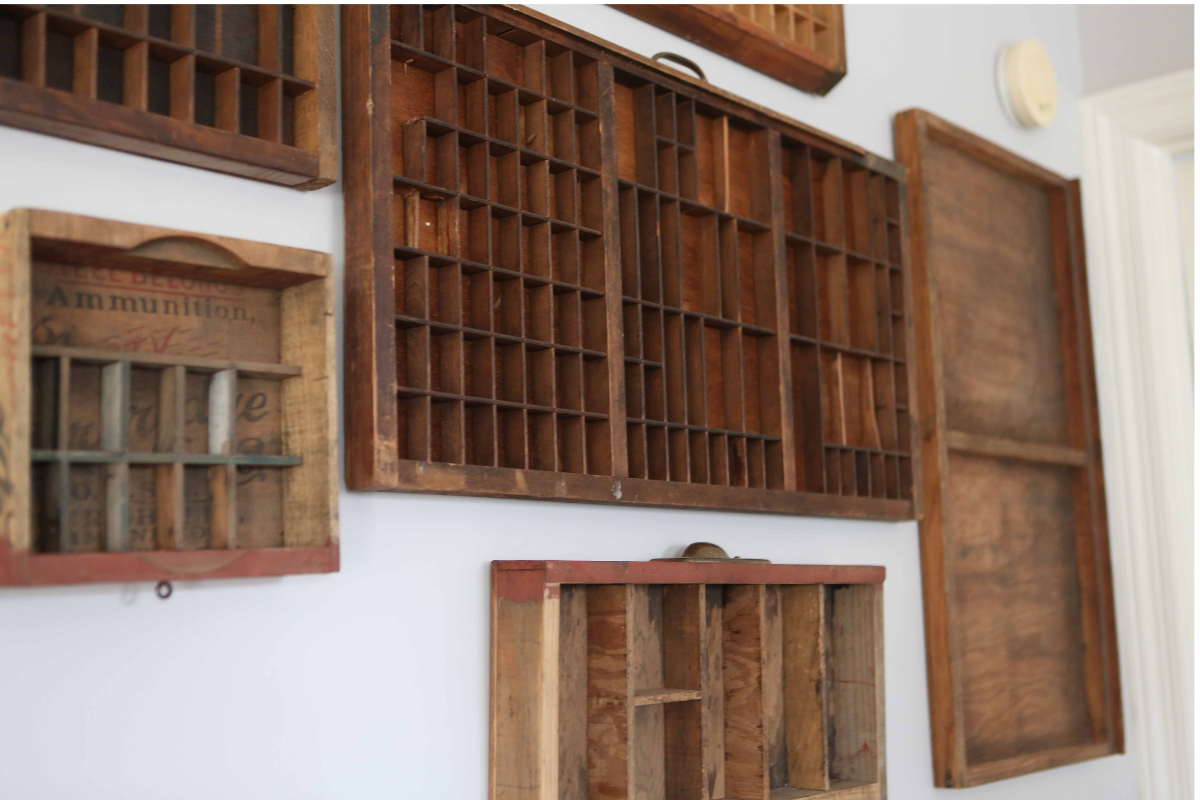
I continue to add trays to this grouping, so if there appear to be some gaps in the grouping that is the reason.
I’m an avid Rae Dunn collector. I’m always on the hunt for Rae Dunn. I had it tucked away throughout the whole house and wasn’t displaying it as I wanted. During one of my junking trips, I found this wonderful cabinet to display some of my Rae Dunn. I’ve added greenery, pedestals and different elements to this grouping. This is another way of fantastic farmhouse DIY’s and ideas!

One More DIY
I have an end table that is many, many years old and had been painted countless times and it was disgusting.
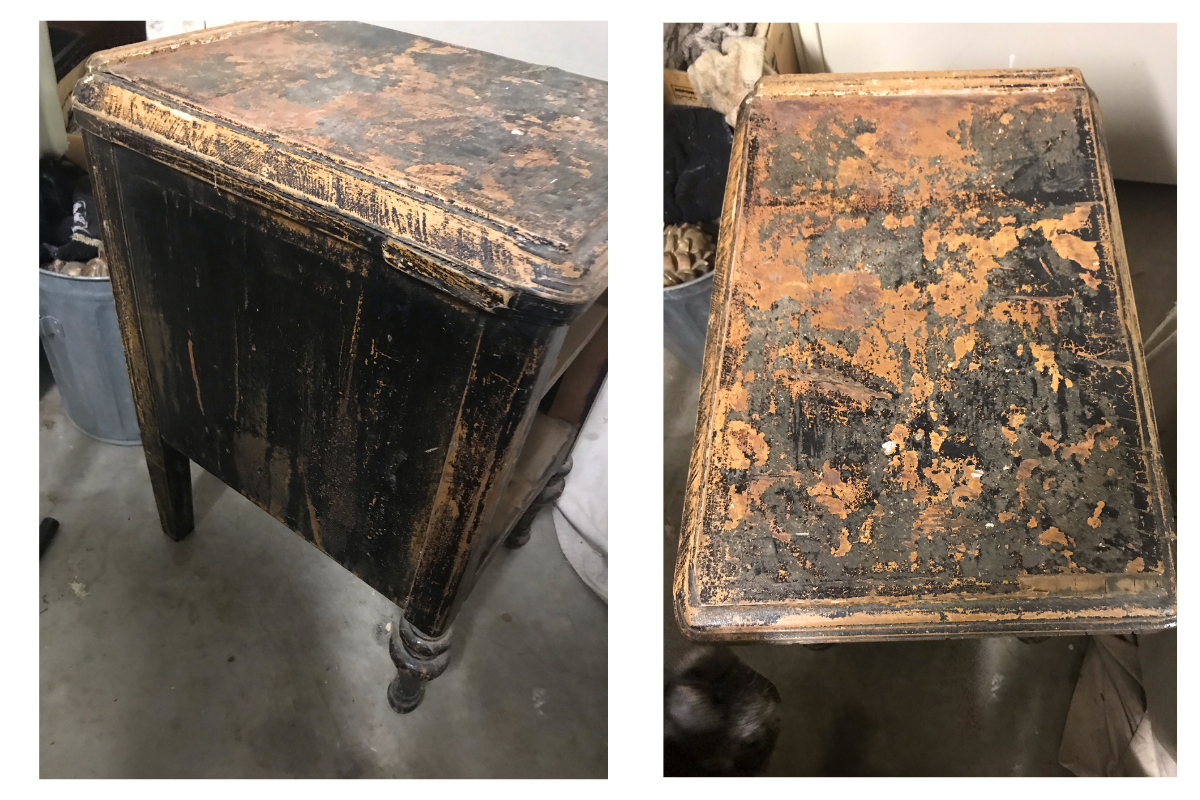
This table took a lot of elbow grease. I used TSP to clean this and used a putty knife to scrape some of the loose pieces of paint. I did wear gloves, masks, and goggles when I did this because this piece is so old and I worried that it may have layers of lead paint. You can find the goggles here, the masks here and the gloves here.
Sanding
I have to admit, this end table took a lot of work and I literally sanded for days! I used an electric sander and also manually sanded, which took many, many days. In addition, I had to get some wood putty to fill in areas and allow the wood putty to dry, in order to sand it down. After all the sanding was completed, I had to clean the end table again.
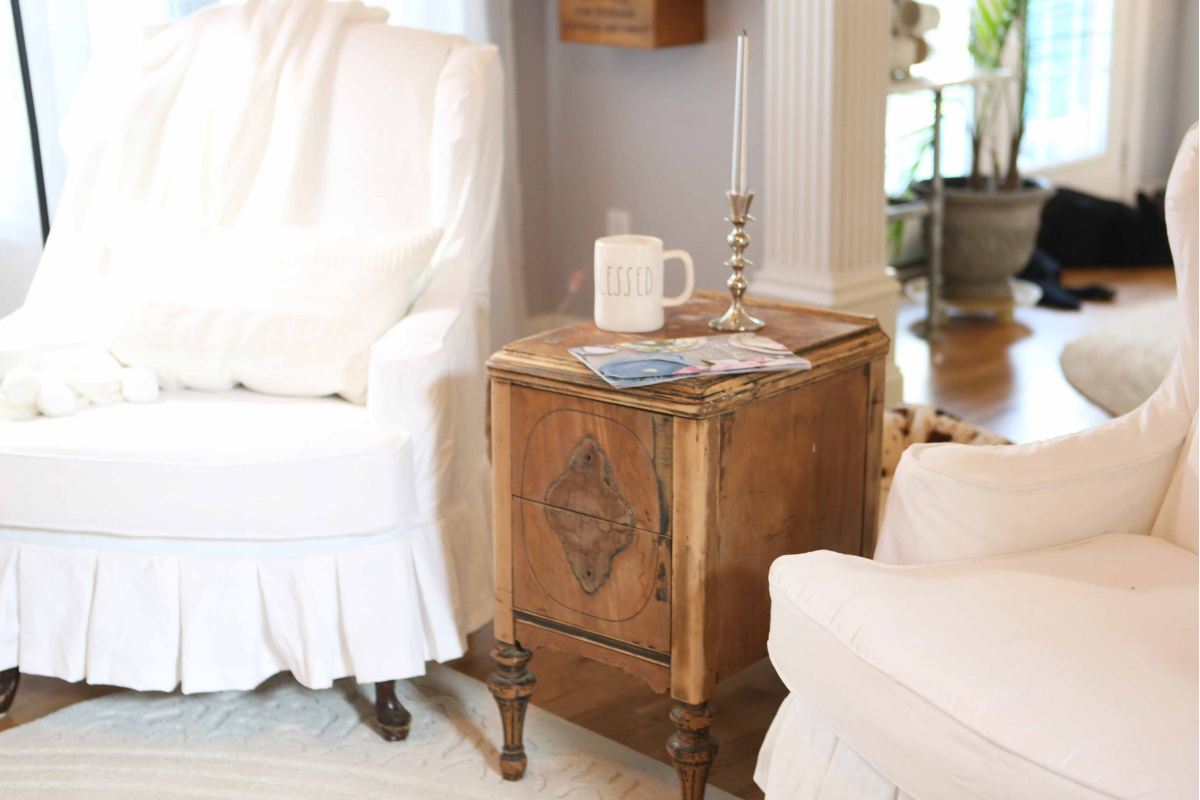
In order for everything to dry thoroughly, I allowed the end table to dry for a few days. I made a decision to polyurethane this end table and not paint it. I suppose, I just didn’t have the heart to apply another layer of paint and that’s why I decided to leave it natural.
Polyurethane
I typically use a wonderful satin polyurethane from Dixie Belle Satin Clear Coat here. This clear coat goes on very smooth, it leaves a nice sheen and very durable. Most important, this clear coat does not yellow.
I applied 3 coats and lightly sanded in between each coat except for the last coat.
It turned out very natural and with all its imperfections, I just love it!
I hope you have gotten some ideas on how to embellish your farmhouse home, even if you live in the suburbs! Enjoy!
XOXO
Connie
Pin It for Later
Sign up to be a part of my community, to receive monthly updates on the latest in my blog. You will also receive VIP access to my FREE Library, receiving tons of freebies, all in one place.

Love this post! Great DIY ideas. I recently got the printer tray from my mother’s house that she didn’t want. I plan to hang it in my daughter’s room when she’s older to display little things of hers. Or just some things that she wants to keep.
Thank you, that’s sounds like a greAt idea too.
Oh, that end table though!
Aww thank you so much.
Holy moly, that is quite a transformation on that little table. It’s so cute! Good job.
I love transforming things.
Love it! I love printer trays, I use mine to hold my essential oils.
Well, that’s a great idea!!